ToyHutt's "Models"
I am proud to show the professional quality of these ... errr professionally painted model...I paid $46 dollars on ebay for broken attennas made of stapels and lumps of plasticine.
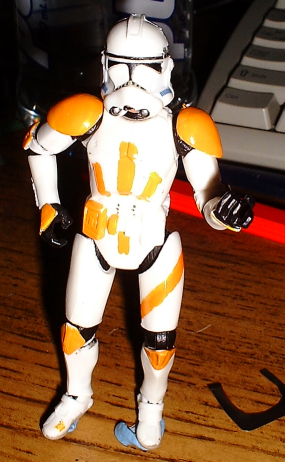
I have one thing to thank "Toyhutt" for, he has inspired me to build my own Commander Cody, this is what I did in 2 hours by comparison:
Wrong paint colour for starters...what's with the Yellow? And the warpaint...supposed to be 3 orange vertical stripes...on Toyhutt's figure...my god is that a flower on his chest?
I've still got the mask detail, some weathering and some components but ... easily done!
Toyhutt, if you're looking, here are the instuctions step by step just in case you want to do some more...
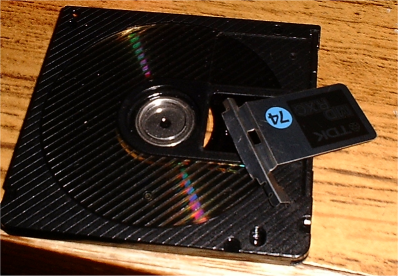
First find a suitable piece of metal for the visor, this is the hardest part...I chose the metal guard off an old Mini-Disk.
Now Cut around the long axis of the guard...
You Will need the following tools...
- 1 Star wars Ep3 AT-TE Tank Gunner figure
- Minidisk casette (or another piece of aluminium
- a pair of very sharp, strong scissors
- a pair of plyers,
- Model Paint: Gunze Sangyo H24 - Orange-Yellow Acrylic was my choice
- 1 Black Gundam Paint Marker
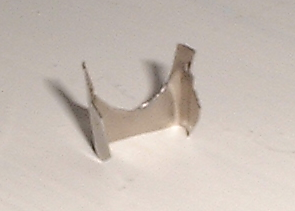
You might take a few goes to get it right...I went through two guards...use the detachable helmet as a guide.
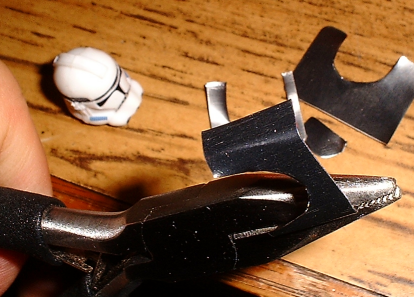
Bend the sides 90 degrees from the horseshoe with the plyers and the corner of a table.
Cut the sides to match the helmet design...
Paint using the Gunze Paint and Voila one visor !
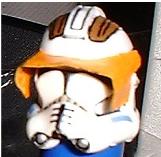
Now paint the trooper, whose starting to look like a cross between a gridiron player and a American Red indian with war paint!
Now paint the helmet sides using H341 & fit the visor
Heres where it starts getting interesting. Take the Gundam Marker and start outlining all the hard edges and start detailing the custom areas...I started with the chin markings then when to the breastplate.
You need a steady had because the marker is actually paint and there is no going back if you make a mistake!
As you can see, this is where, if Toyhutt had one of these markers, he might have rescued his figure!